Set password and activate “lock screen” for computers running on Windows
The computers we use – personal or work computers – contain personal files or important files, which we do not want anyone else to access, especially if this happens without our knowledge or permission!
The computer’s web browser may contain a number of personal accounts and work accounts that may be open, such as: e-mail account, Facebook account, Twitter account, cloud storage account, and sometimes a contact account like WhatsApp.
This means that access to the content of our computer will be a violation of our privacy and can be an inconvenience, embarrassment, and possibly a threat.
For the above reasons mainly, you must protect your computer, via:
-
Set the password for the operating system.
-
Activate the screen lock automatically.
– An operating system password is beneficial if someone tries to run the computer without your knowledge, they cannot access the account because they are demanded a password.
– Activating automatic screen lock, prevents people from accessing your device, and thus access files, information and accounts if you leave the device temporarily.
For example: if you are in a public place (cafe – library …) and you leave the table / device for some reason, someone may take the opportunity to access the device and copy files for example, or to examine your accounts.
Or, put a storage device in and copy files from your device, (it may not take more than 10-15 seconds) * Please refer to the “Disabling Media Autorun”
This file contains:
-
How to create a password | Windows 7
-
How to create a password | Windows 8 – Windows 10
-
Method to set the “screen saver” and activate the automatic screen lock | Windows 7 – Windows 8
-
Set the screen saver and activate the screen lock automatically | Windows 10
[1] Creating a password | Windows 7
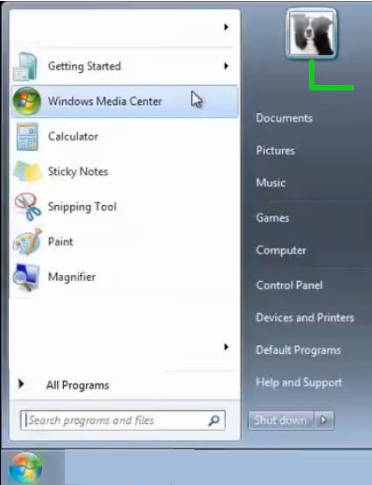
1- Click on the main menu of your desktop (Start menu)
2- Click on the account picture
3- Click on “Create Password”
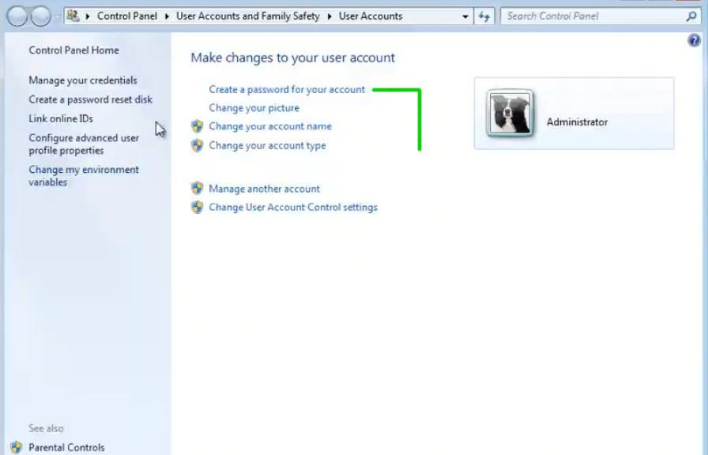
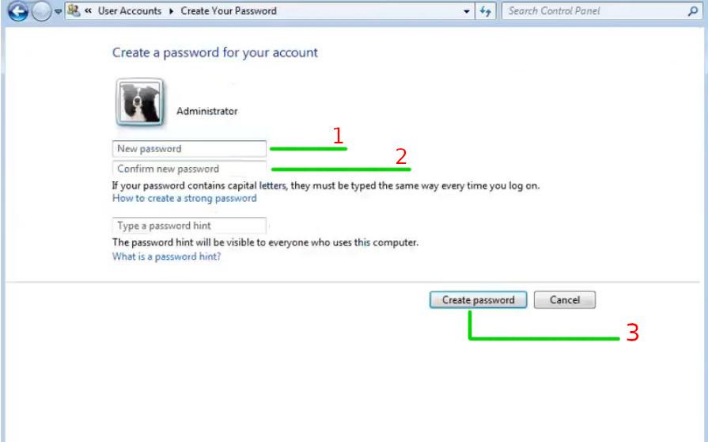
4- Put the password required in the field [1]
– Re-enter password in field [2]
– Then press “Create password”
[2] Creating a password | Windows 8 and Windows 10
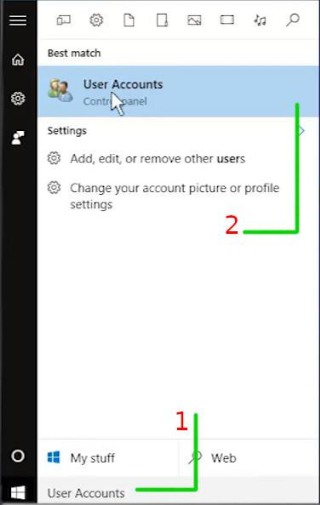
1- Click on the main menu of your desktop (Start menu)
-
In the search window, type “User Accounts”
-
Click “User Accounts”
2- Click on “Manage another account”
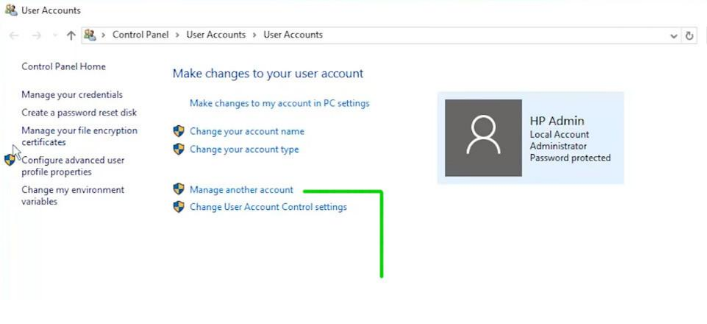
3- Determine the account to which a password needs to be set to
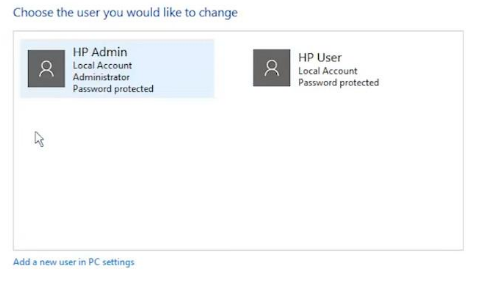
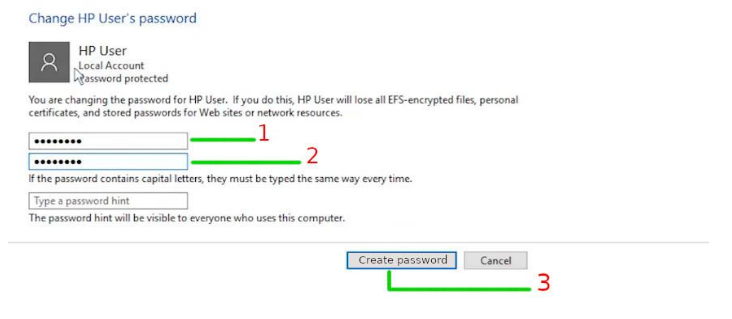
4- Click on “Create Password”

5- Put the password required in the field [1] – Re-enter the password in the field [2]
Then press “Create Password”
[3] Set screen saver and screen lock | Windows 7 – Windows 8
1- Right-click on an empty place on your desktop
2- From the menu, choose “Personalize”

3- Choose “Screen Saver”
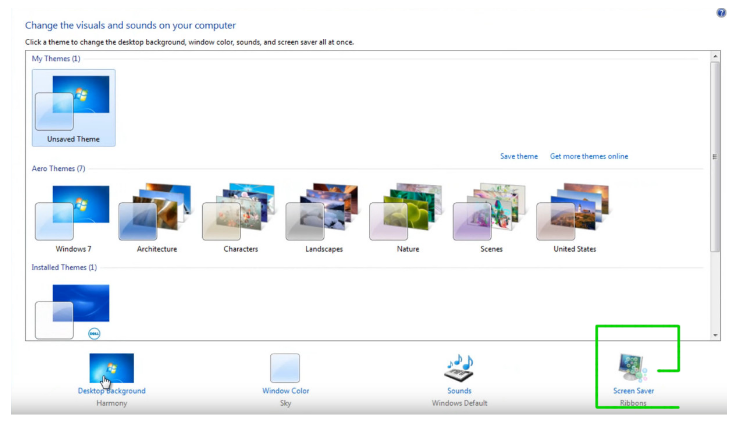
4- Screen saver settings
-
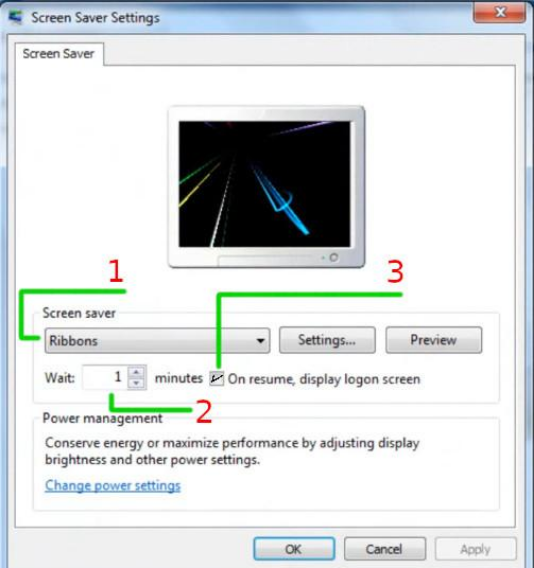
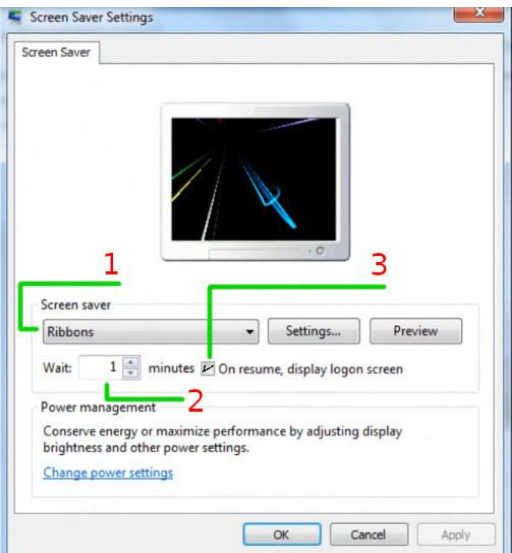
“Screen Saver”: Choose the type of screen saver.
-
“Duration”: Specifies the time when the screen saver should start working when the device is not being used. For example, when you select (1), the screen saver will start working after one minute of not using the device (not using the keyboard and cursor / mouse)
-
“On resume, display login screen”: This option must be selected (by ticking the box) to be logged in to be able to work on the device again. * If an operating system password has been set, the device will request the password to return to work.
5- After setting the screen saver and activating the login request option (request password), press “OK”
[4] Set screen saver and screen lock | Windows 10
1- Right-click on an empty place on your desktop
2- om the menu, choose “Personalize”

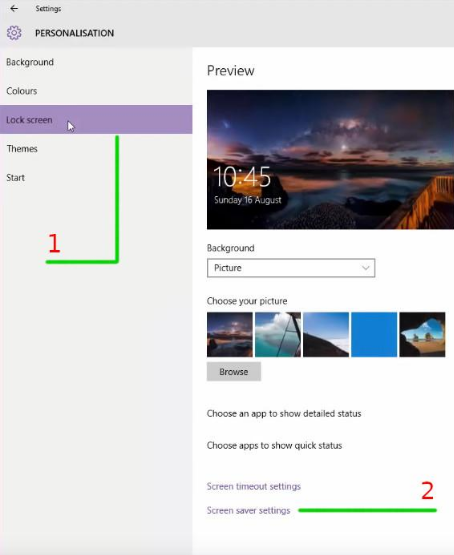
3- From the side menu
-
Select “Lock Screen”
-
Press “Screen Saver Settings”
4- Screen saver settings
-
“Screen Saver”: Choose the type of screen saver.
-
“Duration”: Specifies the time when the screen saver should start working when the device is not being used. For example, when you select (1), the screen saver will start working after one minute of not using the device (not using the keyboard and cursor / mouse)
-
“On resume, display logon screen”: This option must be selected (by ticking the box) to be logged in to be able to work on the device again. * If an operating system password has been set, the device will request the password to return to work
5- After setting the screen saver and activating the login request option (request password), press “OK”
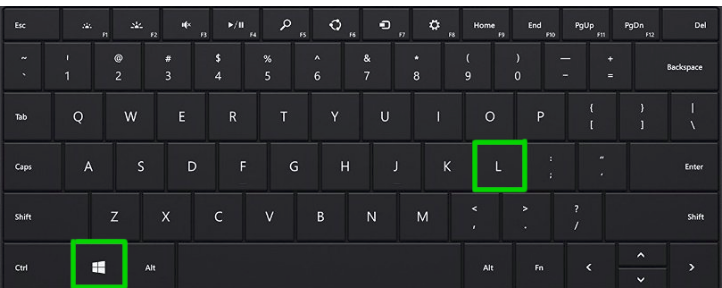
The screen can be locked quickly when you leave the device by pressing the  button with L button. The screen locks immediately.
